Showing posts with label healthy. Show all posts

Thursday

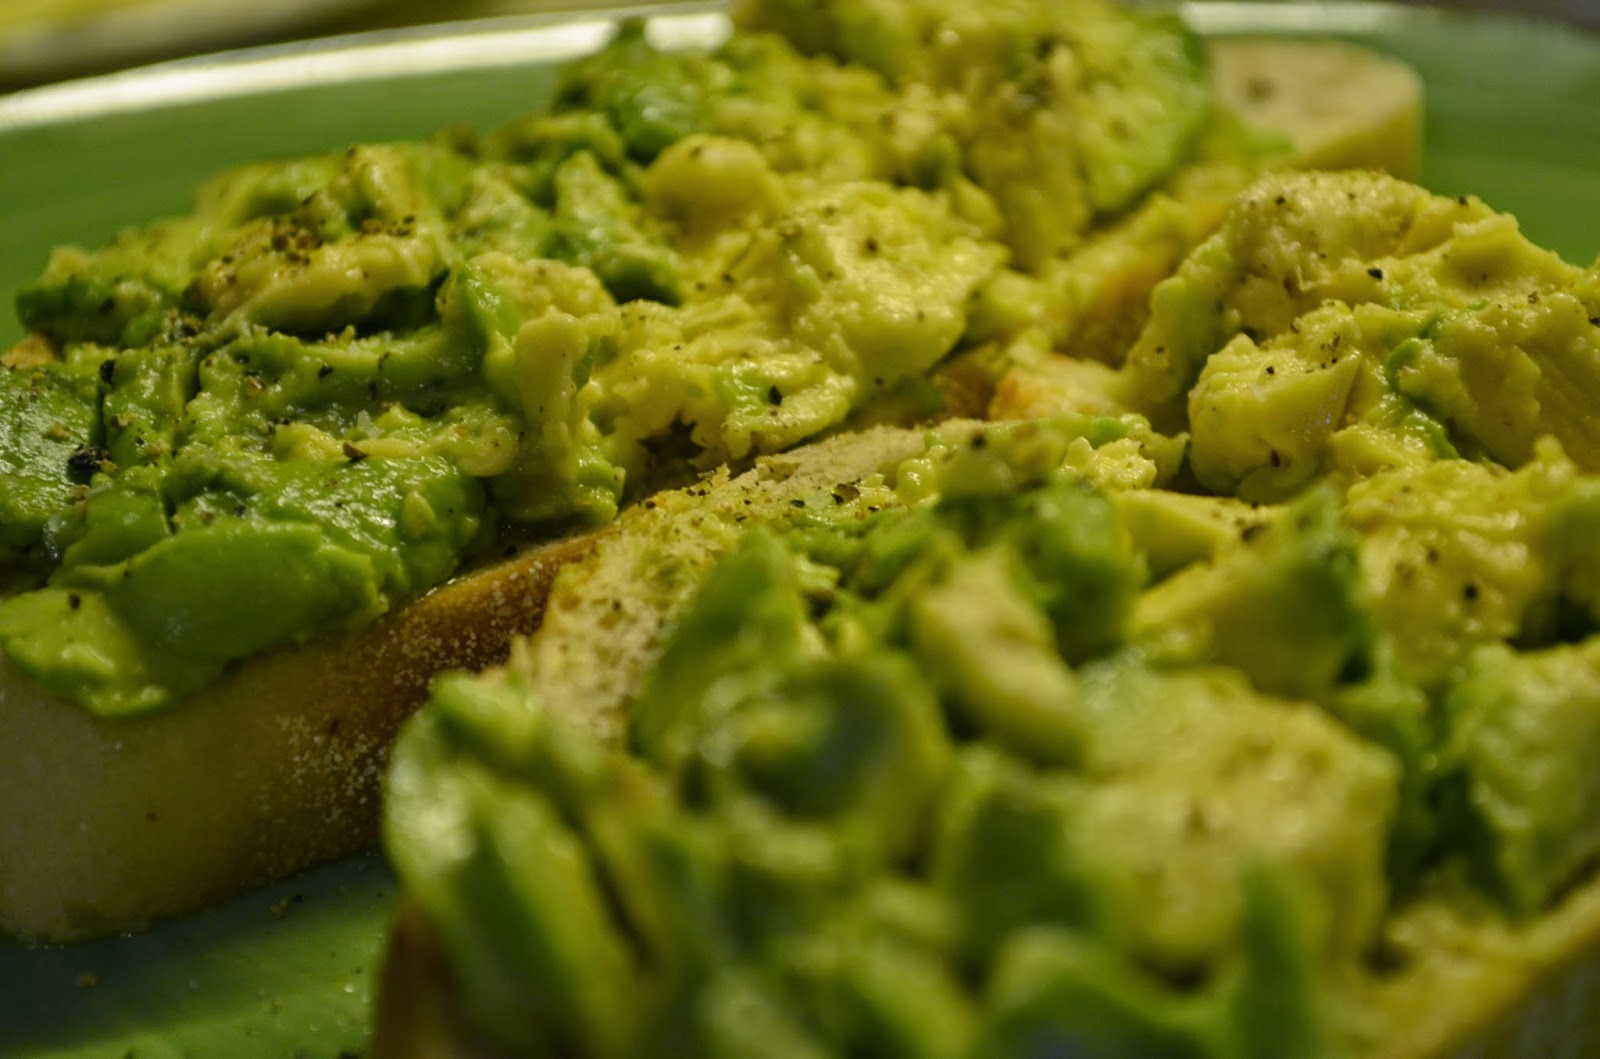
Avocado Toast - Simplistic Decadence


If you know me, you know that I'm not always the first kid on the block to try something new. The smarter-than-me phones? Harry forced my iPhone 4s on me Labor Day, 2013. I only agreed because I drowned my flip phone the week before while fishing on Georgian Bay near Parry Sound, Ontario. I'm pretty happy with my phone now that I have it, but notice I have a 4s. Yes, there was a big release of the iPhone 6 a couple of months ago. So, still behind the times.

Given this, it should be no surprise that I had never heard of avocado toast until sometime after Labor Day, 2014. I came across an article via Yahoo Food explaining variations of avocado toast. I wondered "how can you modify something no one has ever heard of?" Apparently, I was quite wrong.

I could not name one thing wrong with the concept of avocado toast. I love avocado and don't eat it nearly often enough. Toast made from hearty, crusty bread? Sign me up. A drizzle of olive oil, salt, pepper - maybe throw in a swipe of a garlic clove on the toast or a small squeeze of lemon or lime juice and I can't find anything to complain about.

I became slightly obsessed. For several weeks, avocado toast was my Monday lunch. A smoothie instead of cereal or oatmeal for breakfast to allow myself the toast for lunch. I learned that if I was at the store on Saturday, I could buy an under-ripe avocado and it would be perfectly ripe by Monday's lunchtime.

Then, the unthinkable happened. For a few weeks, every avocado was too ripe on Saturday. Maybe because it was the height of college football season and everyone wanted guacamole for the game. Or, was it because everyone else in central Ohio had read the article on Yahoo and decided they wanted to jump on the bandwagon?

I fell into a funk. I would pack my lunch with a sigh and resigned myself to waiting for avocado toast until Cinco de Mayo.

Then, last Saturday, a miracle of sorts occurred. We were getting our groceries on Saturday morning and there it was. The perfectly under-ripened small avocado. I saw the green showing through the flesh and I knew.

It was meant to be.

We already had crusty bread on our shopping list because we were having steak on the grill Sunday and I wanted bruschetta. We can't possibly eat a whole loaf of crusty bread during one meal, so I needed to plan a few other things to use it for.

Avocado toast. Only I didn't eat it for lunch on Monday.

Toast IS a breakfast food, after all.


Monday

Salt-Free Cajun Seasoning Made at Home

I fell in love with Cajun and Creole flavors during a long-term work assignment in Louisiana. This Midwest girl learned that Cajun didn't have to mean "light my face on fire" heat or that everything was blackened. Harry spent some time with a bayou family when I was about 6 or 7 years old - I'm sure it had nothing to do with the hottie in the short-shorts. I'd love to meet her - she and her family taught him about so many wonderful foods and she even gave him some recipes that we use today.

I made a trip to a few grocery stores just before my work assignment ended, stocking up on seasonings, crawfish and Community Coffee. Those items are long gone and I had to learn to make the seasonings myself. I don't criticize anyone for using the major label stuff that is available on the grocery shelves in central Ohio. My biggest problem with the commercial seasonings is that the first ingredient on the label is salt. While salt has its place in almost any cooking as a flavor enhancer, I want to taste the flavors, not the salt.

When we were starting The Wright Taste, we wanted to include a line of seasonings. We scoured the Internet, looking for recipes. We had the same problem as I had in the stores - every recipe had tons of salt. I tried making the recipe and just eliminating the salt but there was no balance of flavors, just some heat.

We had all these spices but couldn't find a good combination on the web. So, we started playing and the strangest thing happened. No salt and equal quantities of six spices gave us the balanced blend of flavors we loved in Cajun food. We labeled this as Cajun Kick and loved that we could tell our customers it contained no salt and they controlled the heat - from a little sprinkle for flavor to a light-you-up heat.

We sprinkle this salt-free Cajun seasoning on pork chops or boneless chicken breasts before cooking. I also use it in any recipe that calls for Cajun seasoning. You probably already have all the ingredients in your pantry!

Measure equal amounts - I suggest starting with 1 teaspoon of each - of these six spices: granulated garlic, granulated onion, ground white pepper, ground cayenne pepper, ground paprika, and ground black pepper. Mix together a store in an airtight container in a cool dark place. If you decide to go big and make a huge batch, store the bulk of it in the freezer, refilling your pantry container as needed.

Sunday

The great homemade yogurt experiment - round one

This was my breakfast this morning. Yeah, I love a hearty breakfast filled with peameal bacon, scrambled eggs, whole wheat pancakes, biscuits and sausage gravy and any host of other breakfast yumminess. But, Harry's working 6-7 days a week and I'm still working on actually eating breakfast every day AND I made my first batch of homemade yogurt in more than 20 years.

Back in the day when I was young and married and filled with adoration of making everything from scratch, we made yogurt often. The father of my children had purchased one of those Salton makers when he was a teenager and yeah, it worked OK. My memories are hazy but I do recall that the yogurt was usually very dry and sour to the taste, and I always had to flavor it heavily to get the kids to eat it. Then, we got divorced, I got custody of the kids and he got custody of the yogurt maker.

Even though I was reduced to buying yogurt at the store, I'm pretty sure I got the better end of the deal.

A couple of years ago, I came across an article from my friend Angie, How to Make Raw Milk Yogurt . I've lived in this area my entire life. I'll admit to not being involved in the local farmers market scene until about five years ago, but those raw milk people are very, very secretive. I was interested in getting my hands on some to make a sourdough starter. NO ONE would talk to me. The one person who admitted to knowing someone who might be able to get some raw milk wouldn't help me out - I guess he was afraid I would follow him.

So, I was stuck buying my milk at Kroger because I didn't have time to go to the Hill's Market to get some low-temp pasteurized milk.

I found a post via Pinterest (are you addicted yet? shoot me an e-mail at debbieandharryskitchen at gmail dot com and I'll send you an invitation) from Emily at Keeper of the Home explaining the slow cooker method of making homemade yogurt. Emily was making 8-cup batches in a round slow cooker. But, I had read a few other yogurt-making blog posts that indicated my huge, oval slow cooker might not work well with a small amount. So, I'm starting with a half-gallon of organic whole milk that, unfortunately, is ultra-pasteurized but at least it's not UHT.

For my yogurt starter, I bought (mistakenly, because I meant to get full-fat) an organic fat-free plain Greek yogurt. In reading through comments from other homemade yogurt-makers, I found that I should try to get a yogurt that has at least five active cultures.

Time to start - by the way, the actual working time about 20 minutes.

Plug in your slow cooker and turn it on to heat up while you are heating the milk. I put mine on the "High - 4 Hour" setting. I poured the milk into a heavy-bottomed saucepan and heated it over medium until it was 185 degrees Fahrenheit. Stir the milk every once in awhile so it doesn't stick to the bottom and scorch.

As soon as the milk hit the right temperature, I put it into half a sink-full of cold water (make sure the water doesn't come up over the top of the pot!). I don't know if I was supposed to leave the milk 'still' but I kind of stirred it around with my digital thermometer until the temperature was right around 100 degrees.

I took my starter yogurt out of the fridge when I started heating the milk. The picture is deceiving - it was a 5.3 ounce container. Add about one cup of the cooled milk to the yogurt to temper it, then add the yogurt/milk mixture to the rest of the milk in the slow cooker.

Turn off and unplug your slow cooker and wrap it in a huge, heavy towel. I took care to tuck the towel under the sides of the cooker. And, in the words of my favorite kitchen geek Alton Brown, 'just walk away'. Leave the yogurt sit idly for 6 to 10 hours. Emily said she usually leaves hers for 8 hours (again, she makes one-quart batches). I unwrapped the yogurt at 9 hours and immediately put it into the fridge where it slept overnight.

Emily suggested resting in the fridge for 12 hours. Mine was there for a little longer than that because the satellite guy showed up early to install the new receiver/DVR so we can feed our "Walking Dead" addiction. After he left, this is what I found. I was shocked that the yogurt seemed so firm! Wow - I actually did it. I made homemade yogurt and I have visions of smoothies and dressings and just yogurt with granola for breakfast dancing in my head. I also saved back one cup of the yogurt in a separate container to start my next batch.

For my first try, I'm very happy. The full texture, once I poured it out of the slow cooker into a container, is a little less thick than your standard Greek yogurt. But, one of my teenage memories of yogurt is staying with a family near Barneveld, Holland and pouring the yogurt out of a carton like milk, then adding a spoonful of this wonderful woman's homemade strawberry preserves. The taste of this yogurt is actually very mild. I was trying to explain it to Harry last yesterday - think about a mildly dry wine, it doesn't suck your cheeks into each other when you taste it and there's just a bit of sour tang.

So, for breakfast this morning, I had some of my homemade yogurt over some really good granola I found in the natural foods section at Kroger. I sprinkled on just a pinch of turbinado sugar, but the granola has a natural sweetness from pomegranate, acai and apples that balanced with the tart of the plain yogurt - I really didn't need the sugar but it sure looks pretty.

The yogurt experiment will be ongoing. I'd like to make smaller batches more often just so I don't risk letting any go bad. I need to know how many times I can "inbreed" my starter before it stops working. I'm sure if I were to use this to start a salad dressing, I would definitely drain it for awhile to thicken it. I'm also thinking about trying a yogurt cheese.

Tuesday

Spaghetti Squash with Roasted Red Pepper Sauce

Yep, another attempt to infiltrate Harry's belly with vegetables. He's getting easier to get along with about it, only reminding me three times a week that I need to learn to eat more beans. The rice blend I got at Costco a couple of weeks ago has lentils in it - isn't that making progress?

I love spaghetti squash. To me, it doesn't have a "squash-y" taste that I associate with butternut or pumpkin. If I manage to cook it properly - which DID happen this time - the spaghetti squash isn't mushy and the strands separate easily. I knew tossing it with just butter, salt and pepper wouldn't be enough to hide the vegetable taste from Harry and I didn't want to go with a marinara sauce.

I found a recipe on Pinterest for Roasted Red Pepper Penne from Jessica at How Sweet It Is. I'm pretty fond of the sounds of her original recipe - whole wheat penne and chicken breasts tossed in this super-simple roasted red pepper sauce. I was going to cheat and just buy a couple of roasted red peppers from the olive bar but Jessica made it easy to understand how to quickly roast the peppers in my oven. Well, almost.

I thought I was picking a rather small spaghetti squash. But, the instructions on the label gave some microwave time per pound. Harry broke out the kitchen scale and this puppy weighed in at 1 pound, 13 ounces - YIKES! On the bright side, I do have some leftover spaghetti squash for my lunch today. Remember that you won't eat the peel or the seeds.

I usually just cut the spaghetti squash in half, place them cut side down in a baking pan with a bit of water and bake for 30-45 minutes. The label told me to pierce the skin all over with a fork, then microwave it whole for about 2 minutes per pound. I went about 3 1/2 minutes. Then, I put the whole, uncut spaghetti squash in a baking pan in a 375 degree oven for about an hour. I pulled it and the ham loaf out when the peppers were roasted and peeled, and let them set for the five minutes it took me to make the roasted red pepper sauce.

These would have only taken about 8 minutes or so to char except I screwed up when I turned on the oven. I think the last thing I baked in the bottom oven was the ham at Christmas and the rack was near the bottom of the oven. I preheated the oven to Broil and slid the pan into the oven. Near the bottom. Fortunately, Harry can actually lift the stone-covered rack while it's heated to 500 degrees as long as he's wearing the Ove-Gloves (love those things - thanks Mom!). Once we got the peppers close to the broiler, things moved along pretty quickly.

As soon as the peppers came out of the oven, I wore an Ove-Glove and slid them into a zip bag. No the peppers didn't cause the bag to melt but touching the hot pan created a small hole - I just folded the bag over. Let the peppers steam inside the bag for 20 minutes or so - this will soften the skins so they peel right off.

Everything got to moving quickly once the skins came off and I didn't get many pictures. I tossed the roasted red peppers into the food processor, added the garlic, basil (dried, because I'm lame), black pepper and Parmesan cheese then gave it all a few whirls. Next, we drizzled in the olive oil and let it run until the sound changed, meaning it was emulsified. We each tasted and Harry declared "needs Franks and red wine vinegar" - that's just how most everything ends in our kitchen.

But, he was right. The Frank's added a kick without too much heat and the red wine vinegar brightened up the sauce.

As soon as the sauce was done, I grabbed an Ove-Glove and cut the spaghetti squash in half. Scoop out the seeds and use a fork to separate the strands. I actually only used about half of the sauce and I've got another cup in the fridge that I'll use for a lunchtime pasta later in the week.

The verdict? I loved it! Harry decided that 1) the squash didn't taste green 2) it was actually kind of good because it held a bit of crispiness and 3) he'd like to try it with a tomato-based sauce. Sigh.

He liked the sauce but I'll have to tread carefully. Another vegetable into our menu planning! And, this dish can actually be considered healthy!

Spaghetti Squash with Roasted Red Pepper Sauce - serves 4 as a hearty side

2 medium red bell peppers
5 cloves garlic (remember we love garlic! - use less if you prefer)
1/3 cup grated Parmesan cheese
1/2 teaspoon crushed dried basil
1/2 teaspoon freshly ground black pepper
2 to 3 tablespoons extra virgin olive oil
1 tablespoon red wine vinegar
Frank's Red Hot Sauce to taste
1 2-pound-ish spaghetti sauce

Place your oven rack near the top of the oven and preheat the oven to broil. Clean the bell peppers, cut in half and remove the seeds and stems. Place the peppers cut side down in a baking pan and place the pan in the oven. You'll want to keep an eye on the peppers - once they start to char, things will move very quickly.

When the peppers are black, remove them from the oven. Quickly place them into a zip bag so that the skins can steam and become easier to peel. Reduce the oven temperature to 375 degrees.

Wash the spaghetti squash and pierce the skin all over with a sturdy fork (the skin is pretty tough!). Microwave on high for 3 to 4 minutes, then place the squash into a baking pan or dish, uncut. Bake at 375 for about one hour.

While the spaghetti squash is baking, make the sauce. The heat from the squash will warm it, so you don't have to heat it up. Peel the blackened skin from the peppers and place in a food processor. (If you have an immersion blender, you can do all of this in a bowl.) Add the garlic, chopped small, Parmesan cheese, basil, black pepper and red wine vinegar and pulse a few times until all the ingredients are incorporated. Drizzle in the olive oil as the processor is running until you hear that it has incorporated. Add a few splashes of Frank's to taste and set the sauce aside.

When the squash has softened, remove from the oven. Working quickly with oven mitts or a potholder, cut the squash in half. Remove the seeds (there won't be many) and discard them. Using a fork, scrape the flesh and it will separate into spaghetti-like strands. Add sauce to coat, stirring gently but mixing well (the sauce will be kind of thick). Sprinkle a little extra Parmesan on top to serve.
Related Posts Plugin for WordPress, Blogger...