Showing posts with label one-pot. Show all posts

Sunday

Chicken and Dumplings from Scratch

When I was a kid, I can remember a couple of my friends' mothers making chicken and dumplings regularly. I still remember Mrs. Altizer whipping together a batch in no time at all one Sunday after church. Mrs. Kerschner made dumplings to serve with mashed potatoes on a week night!

The first time I ever made chicken and dumplings was after I'd been married for about five years. I used a recipe called "Chicken Fricassee and Dumplings" from a Betty Crocker cookbook that was a gift when I first got married in 1983. The ex-husband didn't like them because the chicken was still on the bones. I didn't like them because the dumplings were like biscuits - they weren't like the slippery dumplings I remember from my youth.

For years, the slippery (noodle-like) dumplings eluded me. I would occasionally make the drop dumplings, but I never found a recipe that told me what I was doing wrong. I had to satisfy that slippery-dumpling-craving with occasional visits to Cracker Barrel.

When I saw the picture for this recipe on Pinterest, I knew I had found the dumplings of my memories. The recipe, from the Tasty Kitchen, is easy to follow and a bit different from standard noodles. When I make homemade noodles, the dough is very stiff. I mistakenly used the food processor the first time I made these dumplings but it wasn't necessary. I used the pastry cutter (sorry Alton Brown) to blend the butter into the dry ingredients and it's easy to stir the milk in with a silicon spatula.

The dough will be very soft and you need to use a lot of flour with this recipe to keep it from sticking to the work surface. Someday, when I'm all grown up, I'll remember to buy a pastry mat. Just a few light strokes with the rolling pin and I had a uniform thickness of about 1/8". Uniformity is NOT required when you cut the dumplings with a knife or rolling pizza cutter. Useless trivia: Cracker Barrel uses a special tool to insure uniform dumplings. The prep cook uses a sugar packet to size the cuts.

This day happened to be "Harry's making homemade chicken stock" day. I pulled about four cups from the huge, simmering stock pot and poured it into the smaller pot, added 4 cups of water and about one pound of cooked chicken.

Once the stock and meat was at a strong simmer, I added the dumplings. Go ahead and add the leftover flour from the table - it will help thicken the stock or broth into a nice stew-ish consistency. Simmer for about 20 minutes, taste checking the broth and dumplings.

I forgot and added my black pepper before I took the picture. I love lots of black pepper on anything creamy, so adjust accordingly.

You can use leftover chicken or maybe a deli-rotisserie chicken, along with packaged broth or chicken stock to speed up the process. Because we already had our chicken stock and picked meat, these homemade chicken and dumplings took me about 40 minutes to make.

Chicken and Dumplings from Scratch - serves 6

2 cups all-purpose flour
1/2 teaspoon baking powder
pinch of salt
2 tablespoons cold butter
1 cup of milk (you might need a little less)
2 quarts chicken broth OR 1 quart of chicken stock and 1 quart of water
1 pound cooked, boneless chicken

While you are mixing the dumplings, bring the broth to a strong simmer over medium heat.

In a large bowl, combine the flour, baking powder and salt. Cut in the butter with a pastry blender, pair of knives, or your fingers until the mixture resembles coarse crumbs. Gently stir in 3/4 cup of milk. The dough should be very soft, like biscuits, so add the remaining milk until you have the proper consistency. It will be sticky!

Spread a generous amount of all-purpose flour on your work surface and dust your rolling pin liberally with flour. Pour/scrape the dumpling dough onto the flour. Use light strokes to roll the dough into a uniform thickness, about 1/8". You might have to dust your rolling pin with flour more than once.

Using a knife or a pizza roller (my choice because it was so fast!), cut the dough into square-ish shapes about 2 inches by 2 inches. Don't worry about perfection - the dumplings will change shape while they are cooking and won't be the same size no matter what you do!

I use a slotted spatula to transfer the dumplings from the table into the simmering broth. You want to add most of the flour you have left-over from the rolling to thicken the broth. Stir the dumplings gently and add the chicken meat.

Continue to simmer the dumplings for about 20 minutes or until cooked through.

Usually, I add a few chopped veggies to our chicken and dumplings. Diced carrots and celery add a great flavor. Simply saute them in a splash of extra virgin olive oil or canola oil in the bottom of the stock pot before you add the broth. I like to saute the carrots and celery just until they start to color to add more flavor to the broth. They will finish cooking as you simmer the dumplings.

Tuesday

Slow-Roasted Pork Shoulder

This, my friends, is about 5 pounds of slow-roasted pork shoulder. Harry did a great job of hand-pulling the meat and now it's ready for a variety of recipes - or just nibbling on it until dinner is ready!

When we find a great deal on a huge piece of meat, we can't pass it up. While we would prefer to smoke it, Harry's cooking hours are severely limited. That doesn't mean I can't have juicy, tender pulled pork that I can use in ways other than sandwiches.

I like to keep slow-roasted pork in the freezer for a quick start to a meal. We use it in a lot of our Asian-inspired dishes such as Hot & Sour Soup or stir-fry. It's super-easy to make a quick Pork Fried Rice when all I have to do is chop the meat. When we roast the pork, I also get a large amount of pork broth that I can use to make pork & noodles or simple open-faced pork sandwiches smothered in gravy.

The prep work for the pork takes about as long as it takes for your oven to preheat to 250 degrees. Low and slow is required to keep the shoulder from drying out. Someday, when I plan far enough ahead, I'd like to experiment with oven-smoking.

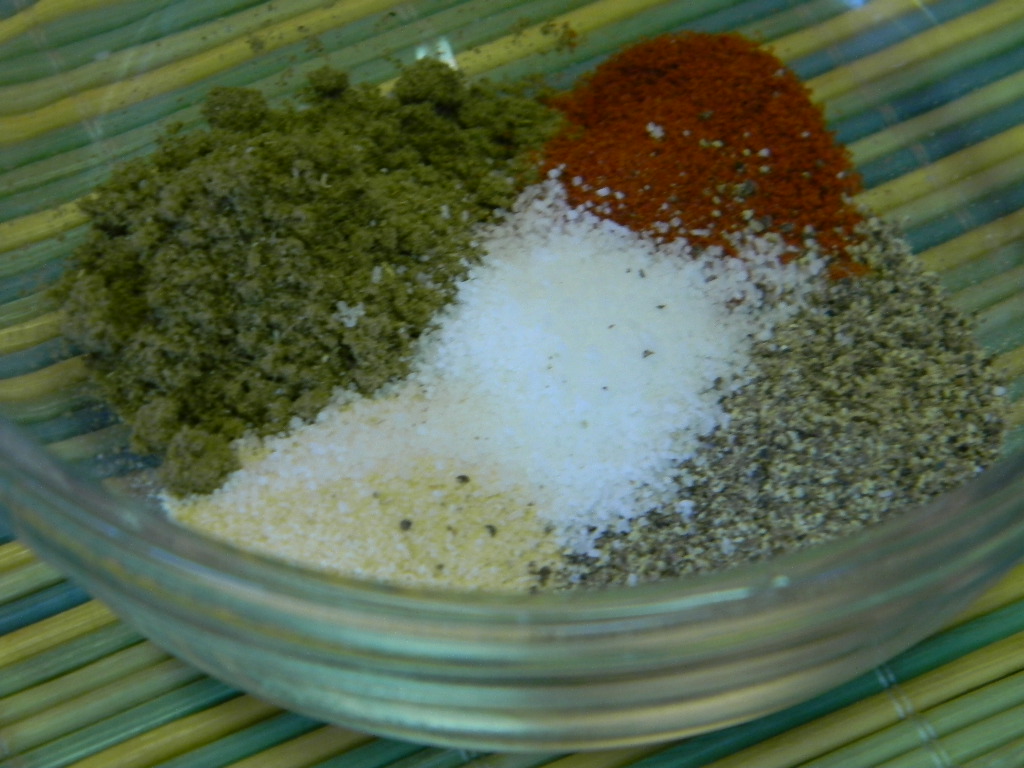
The rub for this pork shoulder is simple. We started with close to seven pounds of raw meat (bone-in), so I went a little light with the rub. In a small bowl, combine 1 tablespoon of sage, 1 teaspoon each of Kosher salt, granulated garlic and ground black pepper, and one-half of a teaspoon of paprika.

You can see that I didn't build up a crust on the pork, but rather a nice, light seasoning. You don't want to mask the flavor of the pork by going too heavy with the rub. Add about a half-cup of water or beer, cover the pan with foil, and walk away for about 6 hours. Do the laundry. Clean the bathroom. Sit on the porch with cocktails and watch the clouds pass by.

I never peek before the pork shoulder has been roasting for at least 6 hours - constant checking will allow the moisture to escape. Since we will remove the fat when we pull the pork, I'm not concerned with getting a crispy crust. You want the pork to test at at least 180 degrees Fahrenheit before you remove it. I've gotten distracted and let it go to about 200 degrees without losing any flavor or tenderness.

Once the pork has cooled enough to handle, you can use your clean hands or a pair of forks to pull the meat from the bone. Package the cooled pork and freeze for later use. OR - mix up a batch of it with your favorite barbecue sauce for sandwiches immediately - do NOT forget the dill pickle slices. They are very important.


Monday

Jambalaya with Shrimp, Chicken and Andouille Sausage

In our continuing celebration of Mardi Gras here in an area of the world that really doesn't care about it, we decided to make Jambalaya. Well, I gave Harry a choice - we could have Jambalaya or Shrimp Etouffee, one of his absolute favorites. When we were in NOLA, he ordered it every single night!

He really wanted his favorite, but settled with 'we've never made Jambalaya before.' Well, I have but it might have been right before we met.

I had to make do with what ingredients I could find here in Ohio, but found some awesome Key West Shrimp and an Andouille-flavored smoked sausage. No, it's not the *real* stuff, but it does provide a great flavor and some heat. Feel free to use regular smoked sausage.

There's no such thing as a one perfect recipe for Jambalaya - it's doing to be different in every single kitchen. In French cooking, the basic building block of most stews is a combination of diced onions, carrots and celery. Cajun and Creole cooks leave out the carrots and use bell peppers. I chose a yellow bell pepper because of the intense sweet flavor. Try to keep your diced veggies about the same size - celery should be a bit smaller because of the density. Sweat them in a stock pot just until they start to give off their aroma - they'll be cooking for awhile and you don't want them to turn to mush. Add the garlic and stir around for a few seconds until you can smell it.

Add the chicken and smoked sausage. We debated later that maybe I should have seared the meat first before I added the vegetables. Yeah, I might have gotten a little bit of caramelization on the meat but in the end, we didn't miss it. Saute and stir around occasionally, until the chicken is no longer pink.

Now I've added all the liquid, canned tomatoes and seasonings. Once this comes to a simmer, it's time to add the rice. Reduce the heat to low, put a lid on it and don't peek for at least 15 minutes. Taste test the rice for doneness, then add the shrimp, stirring gently just to submerge the shrimp. Cover the pot again and it's done in 5 minutes.

And time to eat. I made some quick garlic bread and we nibbled on raw veggies while I was cooking - because Harry was out of peanut-butter filled pretzel nuggets.

Debbie & Harry's Jambalaya - generously serves 6
1-2 tablespoons extra virgin olive oil
1 cup diced sweet onion
3 celery ribs, cleaned and diced
1 medium bell pepper, cleaned and diced
5-6 cloves garlic, minced
8 ounces smoked sausage or Andouille sausage, cut into medallions
2 chicken breasts, cut into chunks
1 15-ish ounce can vegetable broth
1 can low-sodium chicken broth
2 cups water
1 can roasted diced tomatoes
1 can diced tomatoes
2 teaspoons Cajun seasoning (or to taste - we used our Cajun Kick)
1 teaspoon dried thyme
Frank's Red Hot Sauce to taste (or use your favorite hot sauce)
1 tablespoon dried parsley
1 tablespoon red wine vinegar
1 1/2 cups long grain white rice (we love Basmati or Jasmine)
1 pound medium to large raw shrimp, peeled and cleaned
Chopped scallion for garnish

In a large stock pot with a heavy bottom over medium-high heat, saute the onion, celery and bell pepper until the aroma fills your kitchen, about 7-8 minutes. Add the garlic, stirring for about 30 seconds. Then, add the sausage and chicken, stirring well. Continue to saute over medium heat until the chicken is no longer pink.

Add the vegetable and chicken broths, the water, the canned tomatoes and the seasonings. Stir occasionally until the mixture comes to a simmer. Stir in the rice, reduce the heat to low and cover the pot. Do not open the lid until at least 15 minutes have elapsed. If you stir while the rice is cooking, it will clump together and get gooey.

After 15 minutes, taste the rice for doneness and adjust the seasonings if necessary. Gently stir in the shrimp and cover the pot for another five minutes. Garnish the jambalaya with diced scallions and serve with a crusty bread.

Saturday

Lightened Up Italian Wedding Soup

Please pay no attention to the fact that my work table is apparently crooked! This Italian Wedding Soup was so easy and so fast! It's a little bit on the "light and brothy" side for Harry, but I made up a batch of calzones to go with it and the meal was hearty and satisfying.

I love Italian Wedding Soup, but I've only ever had it in restaurants. So, I had to turn to the web looking for inspiration. The first recipe I found via Pinterest turned me off - it suggested adding beaten eggs to the finished soup, similar to Hot & Sour or Egg Drop Soup. That definitely didn't ring any bells for me so I kept searching. I actually found this one at Cooksdotcom and it gave me a good starting point.

I had our homemade chicken stock in the fridge but decided to go with canned vegetable broth instead to cut down the fat content. I've made my own vegetable stock but I'm usually money ahead to use the canned stuff (very rare!). I used our own meatball mix that I froze in bulk for this purpose, but you could easily use turkey meatballs to cut down on the fat some more or frozen meatballs of your pleasure. The seasonings in the meatballs were just right to flavor the broth and I only added a pinch of salt and a few grinds of pepper.


I'm starting with raw meatballs and borrowing a tip from my friend Pam - she never browns her meatballs before adding them to sauce or soup. After the broth came to a simmer, I gently added the meatballs and remembered to stir gently so I did break them up. They cooked beautifully and I think it helped them release their flavors.

I'm always trying to sneak vegetables into our meals and this soup is no exception. I knew we probably wouldn't eat a whole bunch (head?) of spinach before it went bad and didn't want to go to heavy with it in here. We were in a Kroger that had a salad bar so I just bought enough to tightly fill a one-cup measure. Hey, it only cost 23 cents!


And the rest of the veggies I snuck in - every little bit helps!

Lightened-Up Italian Wedding Soup Recipe

1 stalk celery, diced
1 carrot, diced
1/2 medium sweet onion, diced
drizzle of extra virgin olive oil
3 cans (15-ish ounces) vegetable broth
1 cup water
1 pound small meatballs
1/2 cup dry orzo (or broken spaghetti)
Kosher salt and fresh-ground black pepper, to taste
1 cup fresh leaf spinach

In a medium saucepan, saute the celery, carrot and onion in olive oil just until softened. Add the vegetable broth and water, then bring it to a simmer.

Gently add the meatballs, then allow to simmer for 15 minutes. Increase the heat to medium.

Add the orzo, stirring gently and cook until orzo is al dente, about 10 minutes. Taste the broth and adjust the seasoning.

Remove the pan from the heat and stir in the spinach just before serving.If you're feeling really indulgent, feel free to top the Italian Wedding Soup with some freshly grated Parmesan cheese.

Wednesday

I want soup...

Shout out to squidonius at sxc.hu
No - I didn't make that soup or take the pic. A quick perusal through my food porn files found no acceptable soup pics. I have one of a sausage and corn chowder that I posted with an article back in the AC days that drew a comment of "ooohhh...what's the purple - is it onion?"

No - it was taken with a point and shoot that was awesome back in the NOLA days but doesn't work well inside. The "purple" was actually sausage. sigh.

Harry & I really do a decent job of keeping the pantry ready for soup any night of the week. It's fast and we honestly eat a bowl of some sort 3 or 4 times a week through the winter. The speed might be the reason I rarely remember to take pictures of soup in progress - especially on nights that Harry is working.

I threw together a pot of tortellini soup the other night - as promised - and my "work" was done in less than 15 minutes. I had a container of Harry's homemade chicken stock in the fridge and I diced the onions and garlic while the sausage was browning. I did a few dishes while the tortellini was cooking and it was time to eat.

That's why I don't understand complaints of "we're just too busy" when parents say they don't have time to cook but they have time to stop at the drive-thru. In the same amount of time you drive-thru and wait for your order, then get it home and it's no longer hot, you could have a fast pot of soup simmering on your stove. /end rant - sorry.

I've seen Facebook posts from all over the country talking about the current deep freeze. My friend Angie in Savannah lost her pepper plants and banana tree last night - even under a blanket.

It won't be much warmer today than it was yesterday - I think tonight will be beef and barley soup!

What is your favorite type of soup to make at home? No rules - it can be a chili-type, a chowder, hearty, creamy, thin? I'll admit soup is something I always want to hear new ideas!

Spaghetti Sauce by the Gallon!

I love to cook but sometimes we're a little short on time. I love stocking the freezer with the good stuff so we don't fall back on mass-produced crap or think we have to pick up fast food. Double-duty cooking means you take a few extra minutes when preparing one meal to make enough for a second or more.

Hopefully, we'll have luck with growing our tomatoes and maybe score a deal like we did last year. Harry got an amazing price on about 120 pounds of tomatoes from a vendor at the Pataskala Farmers Market in August - $25. I turned most of it into Bloody Mary Mix but also made a couple of quarts of tomato sauce and froze some tomatoes after I peeled and seeded them. They were so good this winter but I'm completely out.

I'm already planning to make this sauce when the tomatoes come in and popping it in the freezer. If you aren't adventurous enough to start from fresh tomatoes, this version of spaghetti sauce uses the canned variety. Quit paying Ragu and Prego and whatever other companies are out there. Homemade spaghetti sauce is a breeze to make. My version makes one gallon for about $5 - how many meals will that make for your family?


Yeah, there's steam coming off of the onions, shallots and garlic. I forgot to take a picture when I used the red wine vinegar to deglaze the pan. Deglazing gets the yummy bits off of the bottom. Be careful to not scorch the garlic.

Here's the spices - seems like such a small amount for so much sauce. Do you know how hard it was for me to actually measure something while I wasn't baking?

After you add the tomatoes and the tomato sauce, throw in the spices. Stir it up, bring to a simmer and leave it on low heat until it's yummy.

I added our homemade meatballs to the mix. You can add browned ground beef or Italian sausage. My friend Trish uses meatballs, Italian sausage links cut into chunks and browned boneless country style pork ribs. Harry was in heaven when I described it to him!

Spaghetti and meatballs with a fresh-tasting sauce - even from canned tomatoes.

Get all the specifics for Double-Duty Cooking: All Purpose Italian Red Sauce by following that link.

Saturday

Soups and Chilis and Stews...oh my!

The weather is turning cooler, the nights are frosty and the days have the chill of approaching winter months. For many that signals the end of grill season; the barbecue is stored, patio furniture covered and neatly stacked and the last vestiges of summer going into hibernation. It’s about time!
Four pounds of meat!

Now is when the kitchen really heats up. As the temperature drops day by day and the white crystallized water starts to accumulate, comfort food is needed to help sustain your sanity. This is the time to open your cookbook and let the winter Big Dogs out to play. I am talking about Soups and Chili and Stews oh my.


Some of the goodies that go into Harry's award-winning chili!

There are countless recipes for each easily accessible on the internet, ranging from the simple “Thirty Minute” variety to the more rewarding and tasting “Evening Event.” Or if you feel lucky “Well, do you, cook?” create your own to suit your particular tastes. The is a wide array of protein, produce, and spices to create a dish that will simply make you happy and content, at least until you have to go out and shovel snow.

Debbie and I started the season with Beef Stew, our own design of course, and now this night my never to be famous (because I will not give out the recipe) Chili with a bit of a Cajun twist. Debbie might give you a hint or two about the recipe if you ask nicely. This is one of those evening events. It takes about three hours from prep to table if you work fast but the result is worth every minute. We always try to make enough for a second meal (it is even better the second day) but alas it seems no matter how much we make someone sneaks in and eats it during the night.

The magic drawer is an absolute requirement to cooking from scratch!

I hope you experiment with your own recipes for the Big Dogs of winter and let us know how it turns out, if you have a question I am sure Debbie will be happy to help.

Good Cooking

P.S. Remember to always cook with wine, and sometimes use it in the food.

Thursday

Texas Straw Hat...Centerburg Schools Style!

My friend Arlene mentioned Texas Straw Hat that was sold at the Oldtime Farming Festival in Centerburg a few weeks ago. So many people immediately had flashbacks to our school days. Personally, I loved it until I walked into the cafeteria kitchen one morning to say "Hi" to Gramma and saw her grinding the kidney beans.

That might explain my to-this-day aversion to beans. I'm going to try to not gross anyone out with the image I still carry in my mind of those beans coming out of the grinder.

Oops. Sorry.

Texas Straw Hat is so simple - and I've seen it on restaurant menus as Frito Pie. Take a handful or so of Frito's, cover it with chili and shredded cheese. I would cheat a bit when my kids were teens and use Chili-O with Onions seasoning mix - it wasn't bad and if I did it right, we had enough left over for chili-dogs the next night.

Gramma loved sharing her recipes. The Centerburg United Methodist Church used to do what Gramma called her "circle cookbooks" and as I thumb through the pages of these books, Gramma always submitted a lot of recipes. How I cherish this collection. It's not only Gramma in those pages - Mrs. Debolt is there, Bertha Wright, Jacque Cordle and Justine Reynolds - although Justine never gave up her recipe for her amazing Butterscotch Pie that I've been able to find.

If you're really looking for a school-days Texas Straw Hat flashback, here's the recipe - according to Gramma, who cooked at the school when they really used to cook. It's cut down to a normal quantity, maybe 6 or 7 servings.

1 cup chopped onion
2/3 cup chopped celery
2/3 cup chopped green pepper
3 tablespoons fat (yes, the word is FAT - I have no idea what they used in the 70s!)
2 pounds ground beef
2-3 teaspoons chili powder
2 teaspoons salt
1/4 teaspoon pepper
2 6-ounce cans tomato paste
2 cups water
2 teaspoons Worcestershire sauce
Dash of Tabasco sauce
1 large can kidney beans, drained and ground up (hmmm...large? probably not a #10 can!)
2 (6 ounce) package corn chips (maybe they weren't Fritos in the 70s?)
2 cups American or sharp cheese, ground up (I'm almost positive it would have been the surplus government American cheese back then)

In large skillet cook onion, celery and green pepper in hot fat until tender, but not brown. Add ground beef and brown lightly. Add remaining ingredients, except corn chips and cheese. Simmer, uncovered, for 1 hour, stirring occasionally. Serve over corn chips and top with a generous serving of the cheese.

There it is - when I make it, I always add diced raw onion on top of the chili and under the cheese.

Enjoy the memories!
Related Posts Plugin for WordPress, Blogger...