Showing posts with label double duty cooking. Show all posts

Tuesday

Slow-Roasted Pork Shoulder

This, my friends, is about 5 pounds of slow-roasted pork shoulder. Harry did a great job of hand-pulling the meat and now it's ready for a variety of recipes - or just nibbling on it until dinner is ready!

When we find a great deal on a huge piece of meat, we can't pass it up. While we would prefer to smoke it, Harry's cooking hours are severely limited. That doesn't mean I can't have juicy, tender pulled pork that I can use in ways other than sandwiches.

I like to keep slow-roasted pork in the freezer for a quick start to a meal. We use it in a lot of our Asian-inspired dishes such as Hot & Sour Soup or stir-fry. It's super-easy to make a quick Pork Fried Rice when all I have to do is chop the meat. When we roast the pork, I also get a large amount of pork broth that I can use to make pork & noodles or simple open-faced pork sandwiches smothered in gravy.

The prep work for the pork takes about as long as it takes for your oven to preheat to 250 degrees. Low and slow is required to keep the shoulder from drying out. Someday, when I plan far enough ahead, I'd like to experiment with oven-smoking.

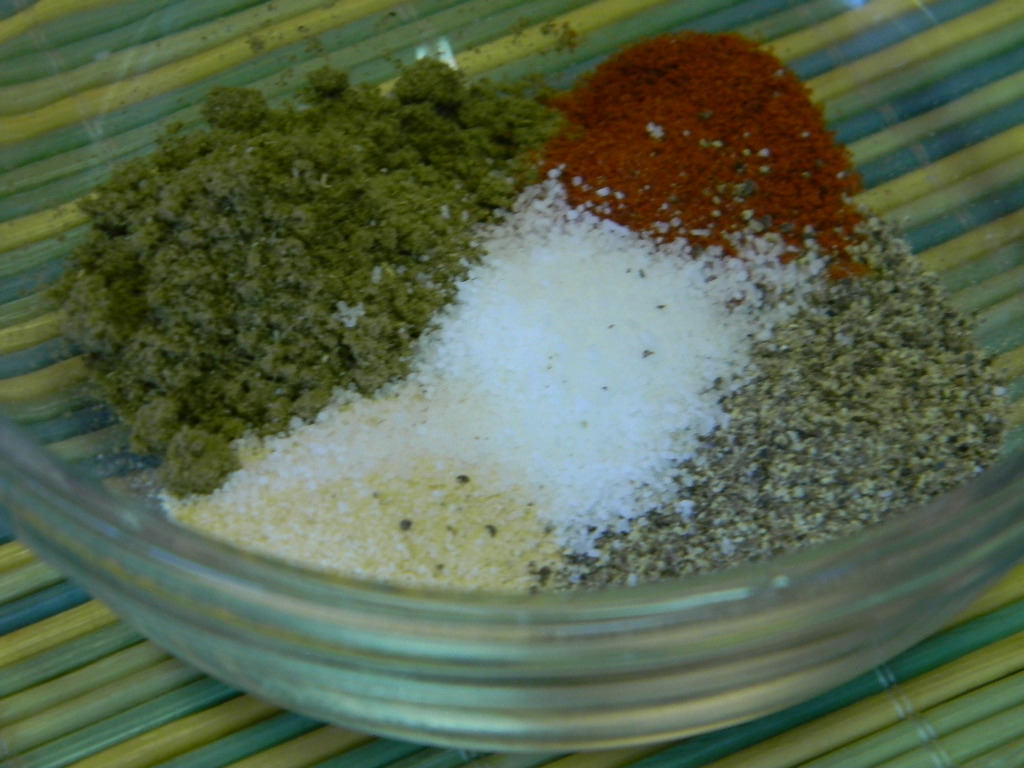
The rub for this pork shoulder is simple. We started with close to seven pounds of raw meat (bone-in), so I went a little light with the rub. In a small bowl, combine 1 tablespoon of sage, 1 teaspoon each of Kosher salt, granulated garlic and ground black pepper, and one-half of a teaspoon of paprika.

You can see that I didn't build up a crust on the pork, but rather a nice, light seasoning. You don't want to mask the flavor of the pork by going too heavy with the rub. Add about a half-cup of water or beer, cover the pan with foil, and walk away for about 6 hours. Do the laundry. Clean the bathroom. Sit on the porch with cocktails and watch the clouds pass by.

I never peek before the pork shoulder has been roasting for at least 6 hours - constant checking will allow the moisture to escape. Since we will remove the fat when we pull the pork, I'm not concerned with getting a crispy crust. You want the pork to test at at least 180 degrees Fahrenheit before you remove it. I've gotten distracted and let it go to about 200 degrees without losing any flavor or tenderness.

Once the pork has cooled enough to handle, you can use your clean hands or a pair of forks to pull the meat from the bone. Package the cooled pork and freeze for later use. OR - mix up a batch of it with your favorite barbecue sauce for sandwiches immediately - do NOT forget the dill pickle slices. They are very important.


Sunday

Homemade Chicken Stock

It's no secret that Harry is the primary hunter when it comes to the meat in our kitchen. He has an eye for the bargains. Whenever he's in the store, he always checks the meat department and looks first for the orange markdown tags.

There is nothing wrong with the meat that has been marked down. By law, grocers have to sell fresh items by a certain date. To cut their losses, grocers will mark down the price, sometimes by as much as half. We've been stocking our freezer this way for years.

Last week, Harry found chicken leg quarters at a stupid low price. He even said later he should have bought more. But, he brought home 11 pounds of quarters for around $5.25 - that's a great deal. We stuck them in the freezer immediately until we could make chicken stock on Sunday.

All you need to make homemade chicken stock is time. Prepping the vegetables took him about five minutes. The time needed is inactive - you just have to let it simmer, skim it occasionally and add more water as needed. Whether we're using whole chicken or quarters, we always pull the meat out when it is cooked - usually after 45 minutes to an hour. Harry picks the meat from the bones and the bones go back into the pot.

For this batch, we used carrots, celery, shallots, a leek, bay leaves, kosher salt and crushed peppercorns. We like pepper, so you might not want as much in your chicken stock.

This stock pot - a gift from my mom - holds three gallons and the only time we use it is to make stock. The technique is simple - put the chicken in the pot, cover it with cold water and bring to a simmer. Add the vegetables and seasonings and let it cook over medium with a slow boil until the chicken meat is cooked. Usually, unless you're serving chicken salad with breast meat, you're going to cook the meat again. It isn't necessary for it to be "cooked" cooked.

After Harry picked the meat from the bones, we have about 3 1/2 pounds of dark chicken meat. In the bowl is the meat I'm going to use to make Chicken & Dumplings and the rest of it will go into the freezer for Chicken Pot Pies, stir-fry, soups or whatever I decide. The skin and the bones go back into the simmering broth.

In another pot, I've added the picked meat to about 4 cups of chicken stock to make the chicken and dumplings. We were running short on time so I didn't chop up any extra vegetables to saute for this batch. Our stock is generally very strong and flavorful, so I also add about 2 cups of water.

Harry will generally let the stock and bones simmer for about two hours to draw as much flavor as possible out of the bones. Sometimes, he needs to add more water and let it cook down. We probably use 4 to 5 gallons of water to make two gallons of stock. The slow cooking and evaporation helps create a sturdy stock that will kick the pants off of anything you buy on the shelf.

When the stock has cooled enough for Harry to handle the pot, he strains it into containers. We let it chill overnight in the fridge, allowing the fat to rise to the surface. Then, I scrape the fat off and put the chicken stock into the freezer for future use.

We made two gallons of chicken stock and the total cost - including pantry items - was about $6. A quart-size box of chicken stock costs around $3 on sale. Plus, we also have three pounds of picked chicken meat in the freezer. I'd say it's worthwhile to make your own.

And these are the Chicken and Slippery Dumplings I made while Harry was finishing the stock. More on that later.


Two Gallons of Chicken Stock
8 to 10 pounds of chicken leg quarters OR
one whole fryer chicken, thawed
3 carrots
3 celery stalks
1 leek
1 shallot
1-2 teaspoons Kosher salt
1 tablespoon cracked peppercorns
3-4 bay leaves


Clean and slice the vegetables in half. All you're trying to do is create a surface for the vegetable flavor to come out of - you don't have to be precise.

Place the chicken in a large stock pot, and cover with at least 2 gallons of water. Bring to a strong simmer over medium-high heat, then add the vegetables and seasonings. Continue to simmer over medium heat for 45-60 minutes until the chicken is cooked.

Remove the chicken to a plate and reduce the heat to low. When the chicken is cool enough, using your hands or forks, pull the meat from the bones, cleaning the skin away from the meat.

After the chicken is pulled, add the bones and skin back to the stock and increase the heat to medium. Continue to cook at a strong simmer for one to two hours, adding water as necessary to concentrate the stock. Adjust the seasonings to taste.

Allow the stock to cool at room temperature until you can safely strain it through a fine sieve or a colander layered with cheesecloth. Pour into containers the size you desire and refrigerate overnight. The next day, skim the chilled fat that has risen to the surface and freeze the containers. We've kept frozen chicken stock for nine months with no flavor issues.


Monday

Meatballs, meatballs, meatballs - subs & spaghetti!

A good meatball sub is hard to find. Harry loves them but doesn't like how the spheres roll out when you try to bite into it! These little beauties are perfect for spaghetti or subs.

I wrote this recipe and left out the veal for anyone who freaks out about eating baby cows. My preferred blend of meat is 2 parts ground beef, 1 part Italian sausage and 1 part ground veal. But, in the interest of all, no baby moo-moos were harmed in the making of this blog post. The photos you see are beef & sausage.

I prefer making a bunch at once and freezing them. Double-duty cooking is huge around here. Why just cook for one meal when I can put something in the freezer for a night that we might not have 2 or 3 hours to spend in the kitchen.

There it is in a big ol' bowl. Ground beef, sausage, our own homemade bread crumbs, some egg and spices and just a bit of Frank's Hot Sauce. I use granulated garlic for these so I don't have to worry about scorching garlic bits while I'm sauteing the meatballs.


All squished up and ready to be rolled. I wish I could find that picture of the mountain of meatballs in my food porn file. This recipe makes about 40 meatballs.
FOUND IT! YAY! It only took about 10 minutes to roll all these by hand.


 I love my collection of cast iron. The "youngest" I have was one that Mom gave me when I first got married in 1983. I needed it to make corn bread and it honestly took about 5 years before I could say it was truly "seasoned" properly. All of the rest of my collection is at least 70 years old.

Sorry - back to the meatballs. My friend Trish showed me how to make them years ago and how to keep them semi-round. Don't overcrowd the skillet - you need some room so cook them in batches. Roll each meatball into the skillet and shake the pan to keep them moving. You're not trying to cook them all the way through. I have another friend who has gotten the method down to not even brown the meatballs before adding them to her sauce. Must mind-meld with Pam Gaulin.

Isn't that pretty? No, I'm a dork and each time we've had meatballs subs, I keep forgetting to take a picture.

For all the ingredients follow the bouncing ball to Double Duty Cooking: Italian Meatballs

Yes, really. Frank's Original Red Hot DOES come in one gallon jugs! I try to catch it on sale at GFS Marketplace for around $10. If you don't have a GFS around you and you put that sh#t on everything, you can order it here.
Related Posts Plugin for WordPress, Blogger...